Install osCommerce on a Linux
osCommerce (Open Source Commerce) is a free solution for online store software, representing an alternative to other e-commerce platforms such as Magento, OpenCart, PrestaShop.
Open Source Commerce (osCommerce) is a complete self-hosted online store solution that contains both a catalog frontend and an administration tool backend which can be easily installed and configured through a web-based installation procedure.

In this tutorial we will show you how to install osCommerce on a Linux.
Step #1 Installing LAMP
First you need to install LAMP(Linux, Apache, MySQL/MariaDB and PHP) using following command:
For CentOS/RHEL 7
# yum install httpd mysql mysql-server php php-mysql php-pdo php-gd php-mbstring
For CentOS/RHEL 6 & 5
# yum install httpd mysql mysql-server php php-mysql php-pdo php-gd php-mbstring
After installing LAMP stack need to start service using following command:
For CentOS/RHEL 7
# systemctl start httpd
# systemctl enable httpd
# systemctl start mysqld
# systemctl enable mysqld
For CentOS/RHEL 6 & 5
# service httpd start
# chkconfig httpd on
# service mysqld start
# chkconfig mysqld on
Set root password using following command:
# mysql_secure_installation
Step #2 Create Database for osCommerce
Next we will need to log in to the MySQL console and create a database for the osCommerce. Run the following command:
# mysql -u root -p
mysql> create database oscommerce;
mysql> grant all privileges on oscommerce.* to 'oscommerce'@'localhost' identified by 'secretpassword';
mysql> flush privileges;
Step #3 Install osCommerce
osCommerce is an Open Source, PHP based application which can be downloaded for free from osCommerce’s official website.
# cd /opt
# wget http://www.oscommerce.com/files/oscommerce-2.3.4.zip
Unpack the osCommerce archive to the document root directory on your server:
# unzip oscommerce-2.3.4.zip
# cp -rf oscommerce-2.3.4/catalog/* /var/www/html/
Step #4 Set Permissions
In this we need to modify the permissions of the source code. Use the following command to modify the permission:
# chmod -R 755 /var/www/html/*
# chown -R apache.apache /var/www/html/*
# chmod 777 /var/www/html/includes/configure.php
# chmod 777 /var/www/html/admin/includes/configure.php
Step #5 Accessing osCommerce
Now open a browser and open the link as below:
http://<ip_or_domain>/install/index.php
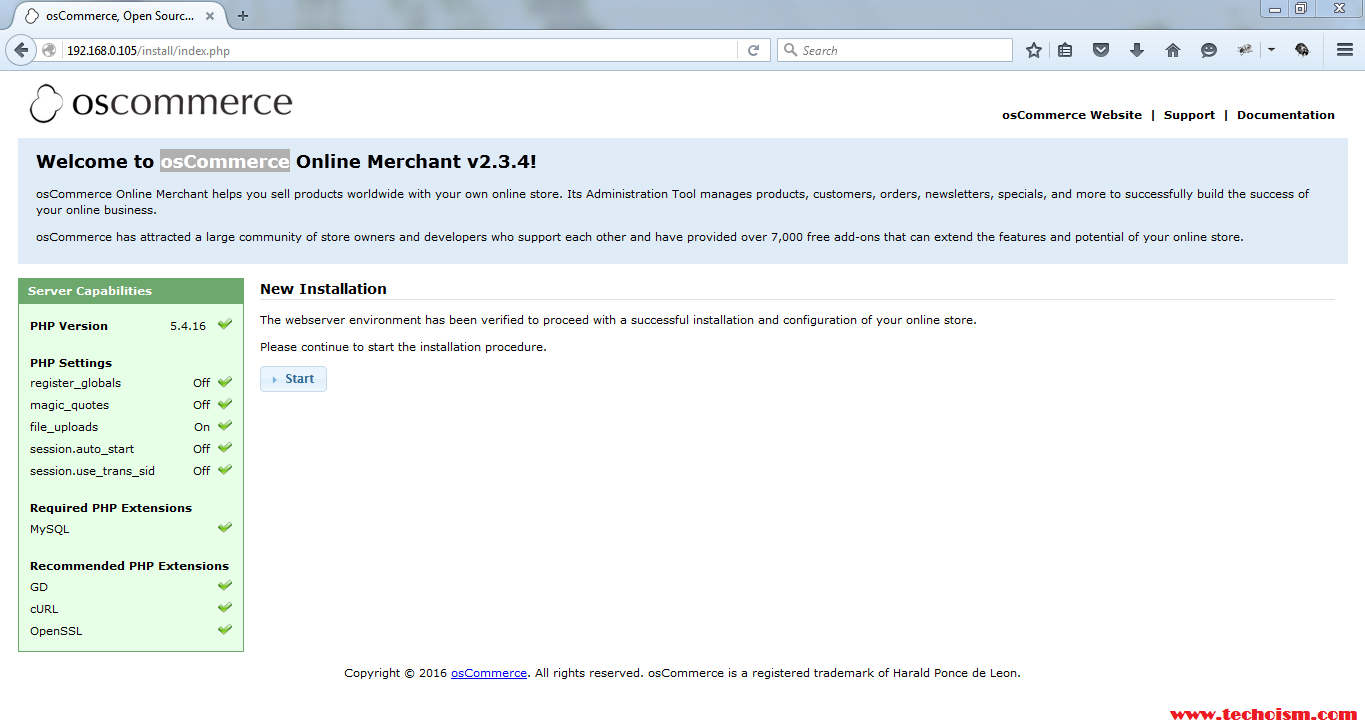
Once the main screen appears, Click Start:
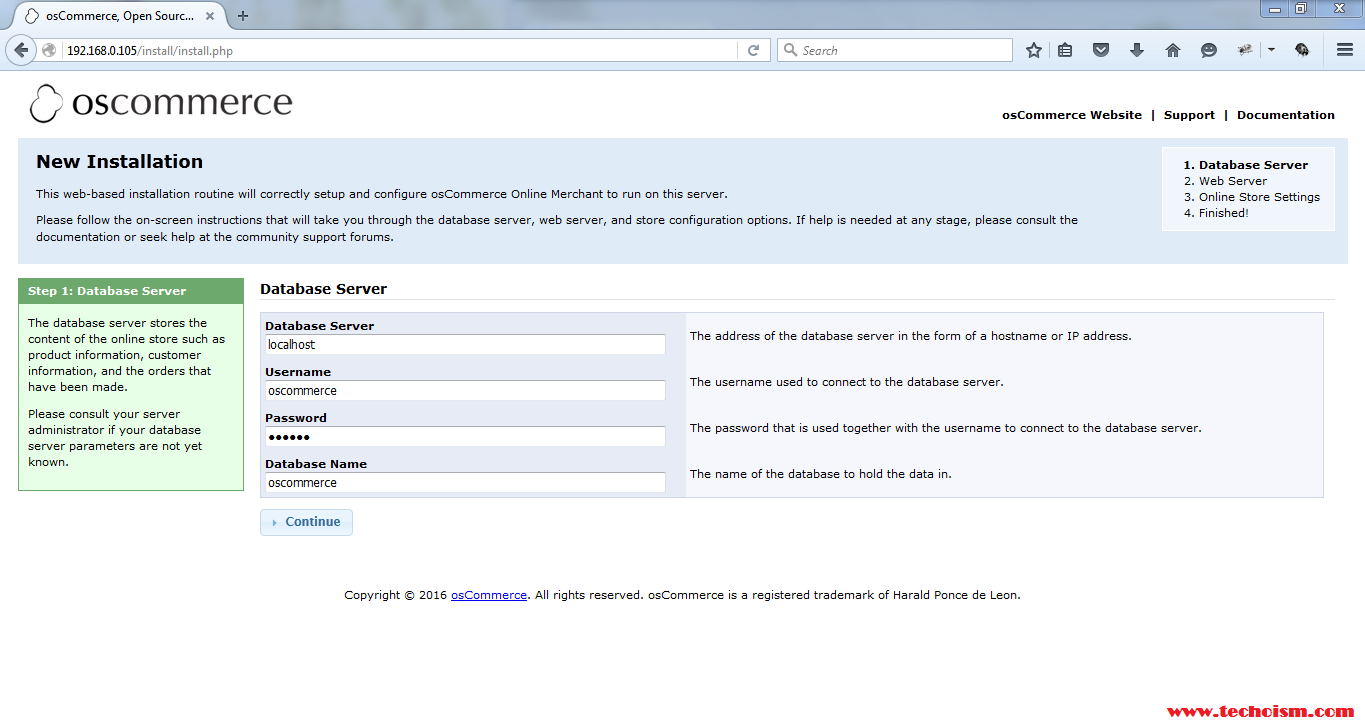
Enter the database details created earlier accordingly for osCommerce MySQL database:
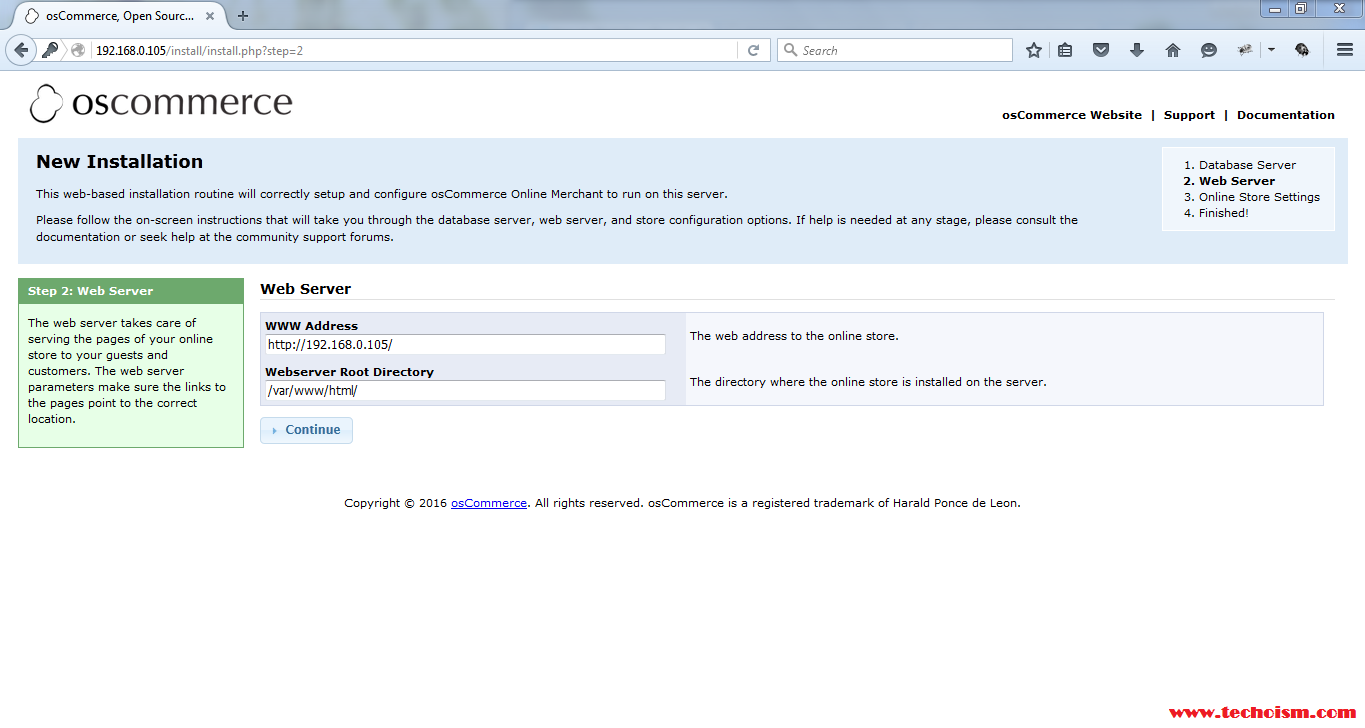
Now enter the web address of your store and the webserver document root and press Continue.
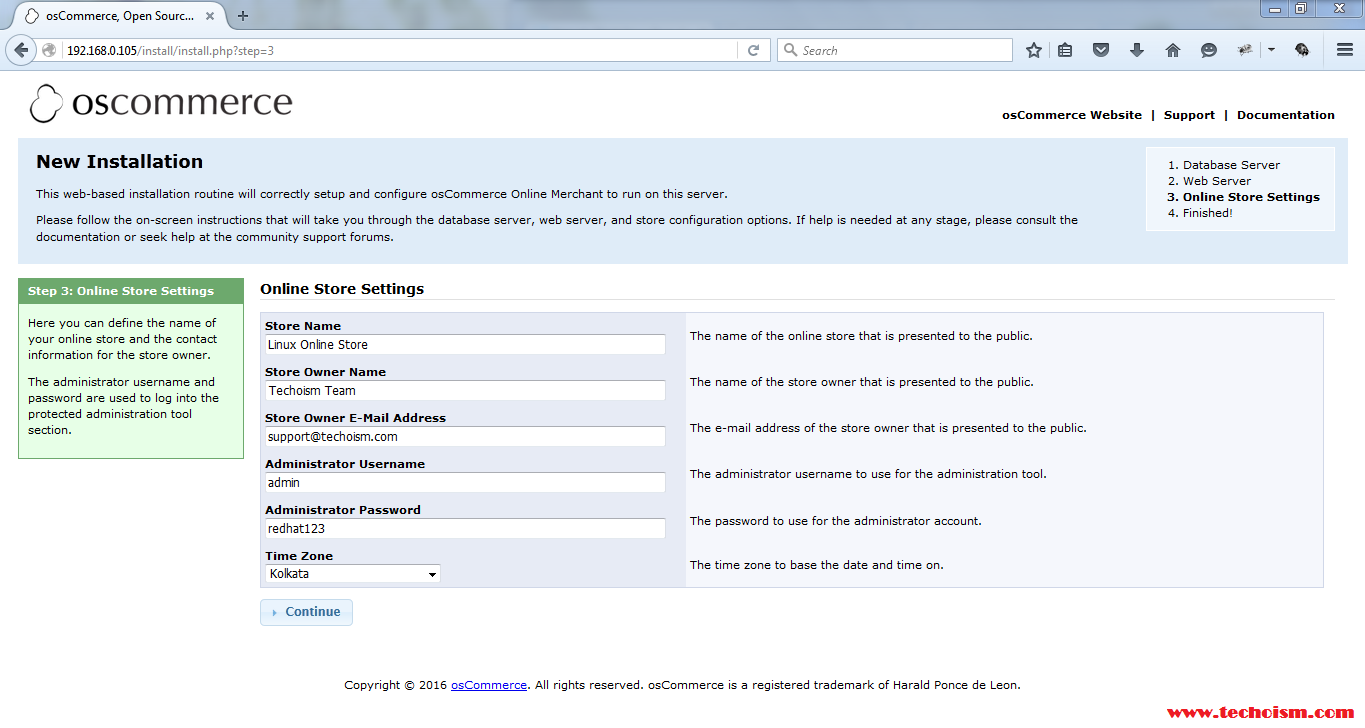
Now enter detailed information about your online store and click continue.
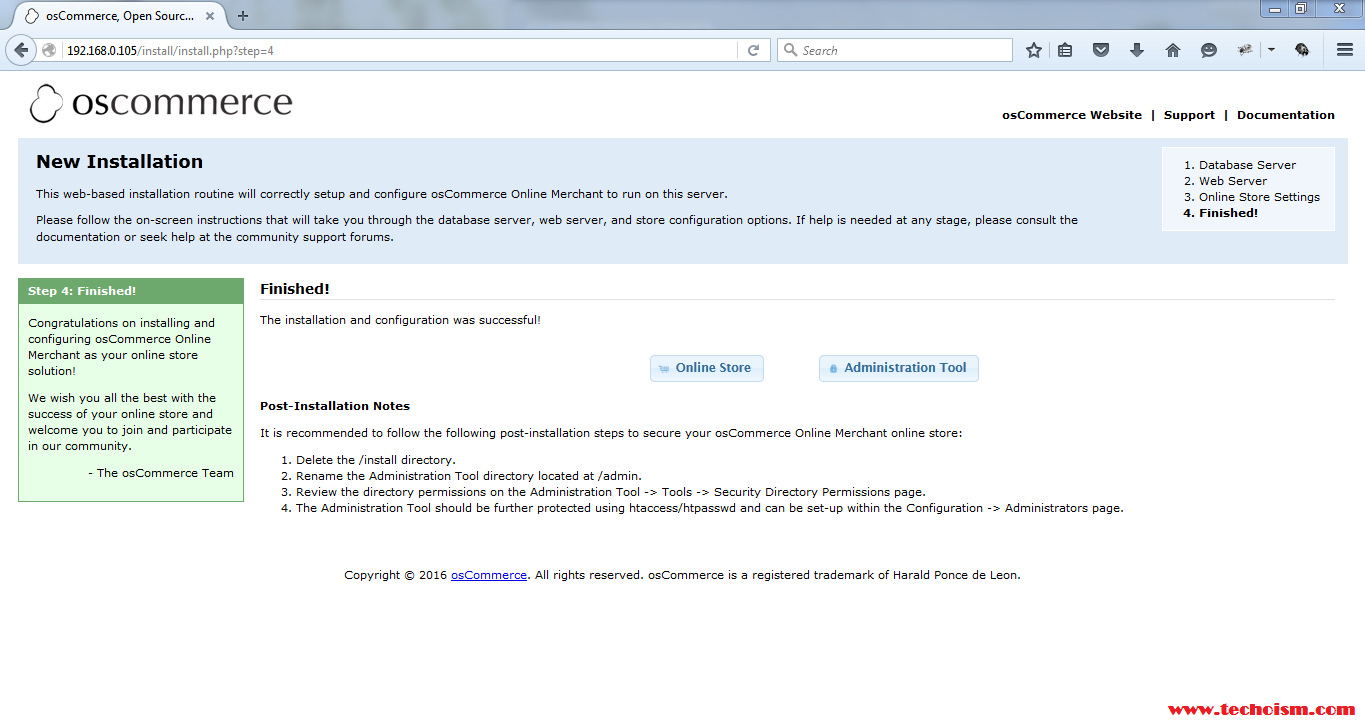
After you finish the installation process, enter command line again to the server and issue the following commands in order to revert changes made to osCommerce configuration files. Also remove the installation directory.
# rm -rf /var/www/html/install/
# chmod 644 /var/www/html/includes/configure.php
# chmod 644 /var/www/html/admin/includes/configure.php
Next, access osCommerce Admin Panel using the following address and login it using credentials.
http://<ip_or_domain>/admin/login.php
Also navigate to Tools -> Security Directory Permissions to get the recommended application permissions.
# chmod -R 775 /var/www/html/images/
# chown -R root:apache /var/www/html/images/
# chmod -R 775 /var/www/html/pub/
# chown -R root:apache /var/www/html/pub/
# chmod -R 755 /var/www/html/includes/
# chmod -R 755 /var/www/html/admin/
# chown -R root:apache /var/www/html/admin/backups/
# chmod -R 775 /var/www/html/admin/backups/
# chmod -R 775 /var/www/html/includes/work/
# chown -R root:apache /var/www/html/includes/work/
The Administration Tool should be further protected using htaccess/htpasswd and can be set-up within the Configuration -> Administrators page.
# chmod 775 /var/www/html/admin/.htpasswd_oscommerce
# chmod 775 /var/www/html/admin/.htaccess
# chgrp apache /var/www/html/admin/.htpasswd_oscommerce
# chgrp apache /var/www/html/admin/.htaccess
Then, navigate to Configuration -> Administrators, click on Edit button and fill it with your credentials. Save the new configuration and server authentication will be enforced as illustrated on below screenshots.
Access osCommerce using following link.
http://<ip_or_domain>/index.php
Enjoy it!

