How to Install Oracle Database 12c Release 2 in Linux 7
Oracle Database is an object-relational database management system (RDBMS) developed by Oracle Corporation. The Oracle Database 12c is a high-performance, enterprise-class database. Oracle Database is the most popular, trusted database systems. Oracle Database support multiple operating systems like Redhat, SUSE, Oracle Linux, Microsoft Windows and IBM Linux.

In this article we will explain how to install Oracle Database 12c on Linux Server.
Step 1: Prerequisites
Packages:
First we need to install the required packages. These packages we can easily get from OS officially repository.
# yum install -y binutils.x86_64 compat-libcap1.x86_64 gcc.x86_64 gcc-c++.x86_64 glibc.i686 glibc.x86_64 glibc-devel.i686 glibc-devel.x86_64 ksh compat-libstdc++-33 libaio.i686 libaio.x86_64 libaio-devel.i686 libaio-devel.x86_64 libgcc.i686 libgcc.x86_64 libstdc++.i686 libstdc++.x86_64 libstdc++-devel.i686 libstdc++-devel.x86_64 libXi.i686 libXi.x86_64 libXtst.i686 libXtst.x86_64 make.x86_64 sysstat.x86_64 zip unzip
Host File:
The host file must contain a fully qualified name for the server.
127.0.0.1 oracle.techoism.net oracle
192.168.1.110 oracle.techoism.net oracle
Selinux:
Set secure Linux to permissive using selinux configuration file.
# vim /etc/sysconfig/selinx
Change the parameters.
SELINUX=permissive
Reboot the server or execute the mention command.
# setenforce Permissive
IPTables:
If on server Linux firewall is enabled, so you need to stop it and need to configrure it.
For CentOS/RHEL 7
# systemctl stop firewalld
# systemctl disable firewalld
For CentOS/RHEL 6
# service iptables stop
# chkconfig iptables off
Step 2: Create User and Group
Oracle database will run with normal Linux user. So we need to create the user and group for oracle.
# groupadd oinstall
# groupadd dba
# useradd -g oinstall -G dba oracle
Set the oracle user password.
# passwd oracle
Step 3: Kernel Parameters
Now we need to configure our system before start the installation of Oracle Database. Add mention kernel parameters in sysctl.conf file.
# vim /etc/sysctl.conf
Add the mention lines.
fs.aio-max-nr = 1048576
fs.file-max = 6815744
kernel.shmall = 2097152
kernel.shmmax = 8329226240
kernel.shmmni = 4096
kernel.sem = 250 32000 100 128
net.ipv4.ip_local_port_range = 9000 65500
net.core.rmem_default = 262144
net.core.rmem_max = 4194304
net.core.wmem_default = 262144
net.core.wmem_max = 1048586
Reload the configuration file to reflect the changes.
# sysctl -p
# sysctl -a
Next, we need to configure some limits for the oracle user.
# vim /etc/security/limits.conf
oracle   soft   nproc    2047
oracle   hard   nproc    16384
oracle   soft   nofile   1024
oracle   hard   nofile   65536
oracle   soft   stack    10240
oracle   hard   stack    32768
Step 4: Configure X11 Forwarding
X11 forwarding refers to executing such a program remotely through an SSH (Secure Shell) connection. With X11 you can easily install the Oracle Database. You can use mention link to configrure X11 on server.
Step 5: Create the Directories
Before installing Oracle Database, create directories that will be used during the Oracle installation, and provide the required permissions.
# mkdir /u01
# chown -R oracle:oinstall /u01
# chmod -R 775 /u01
# chmod g+s /u01
Step 6: Extract the File
Once you will download the Oracle database setup from Oracle official website. Extract the Oracle files on a Linux server.
# cd /software
# unzip linuxx64_12201_Oracle_database.zip
Step 7: Install Oracle Database
Start the Oracle Database Installer issuing the following command in the database directory.
# cd /software/database
# ./runInstaller

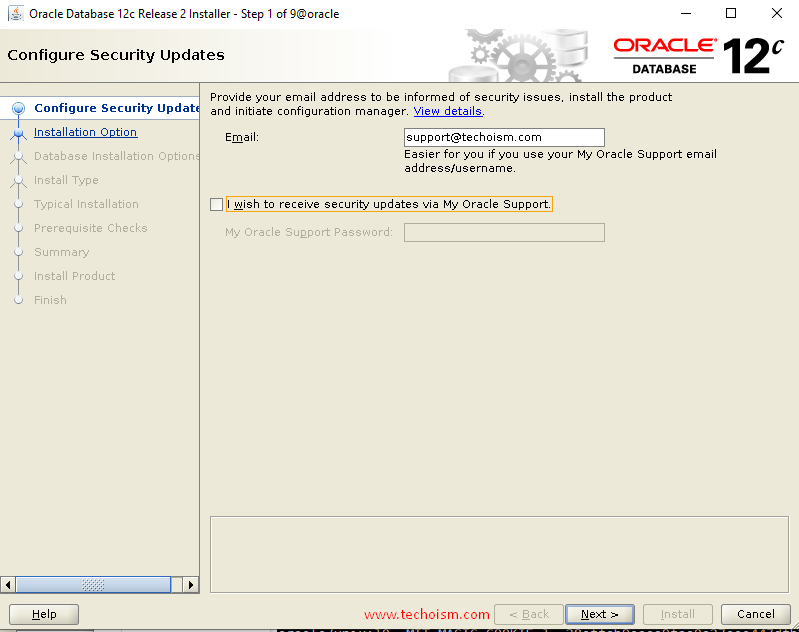
Provide your email address to be informed of security issues and click “Enter”
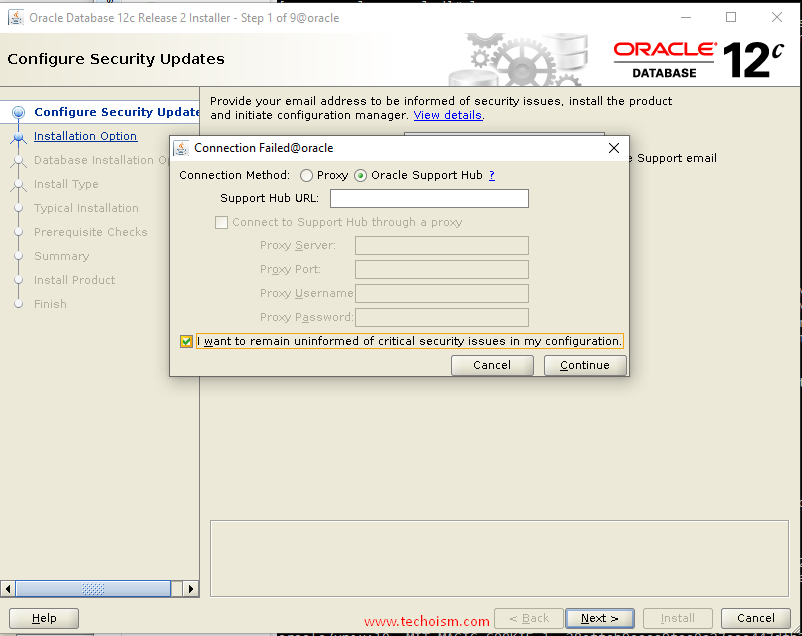
If you are using any proxy server then provide the details of proxy server and click “Continue”
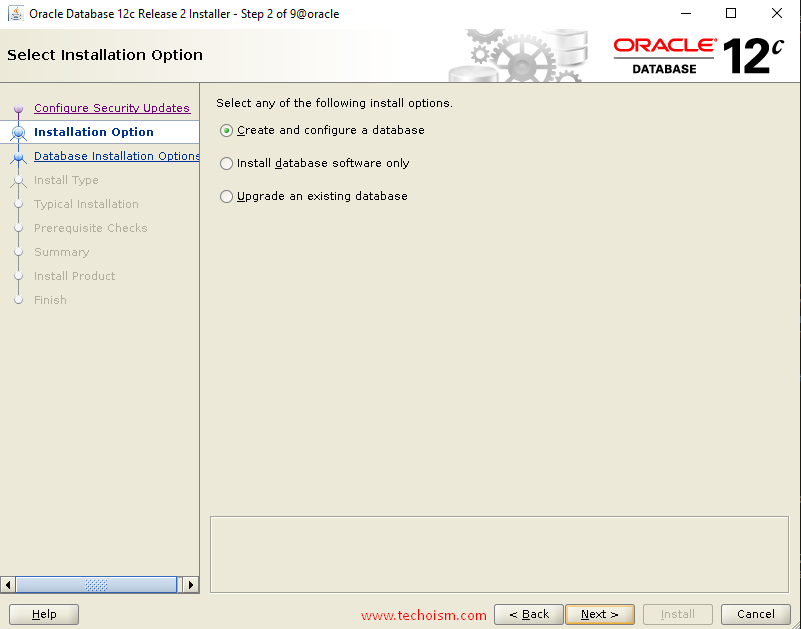
Choose create and configure a database option and click “Next”
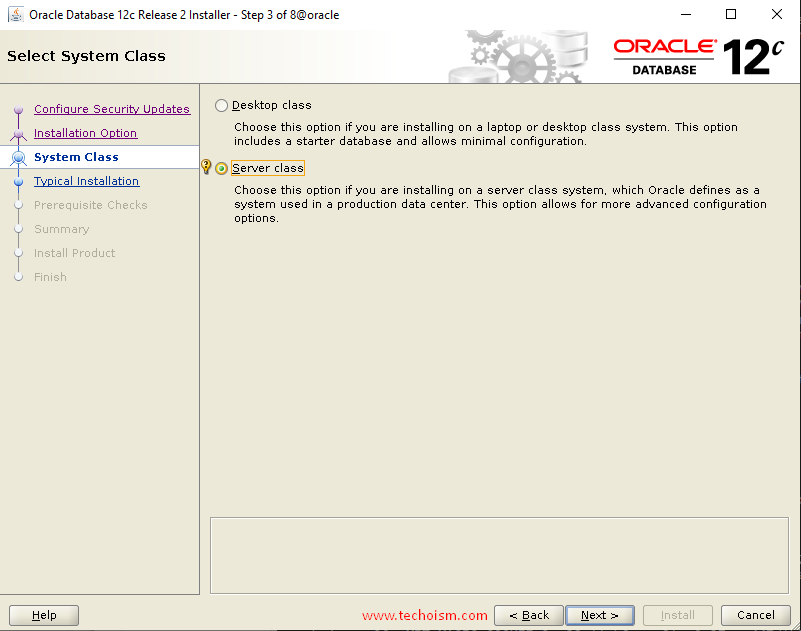
Under the ‘System Class’ section, choose system class and click “Next” again.
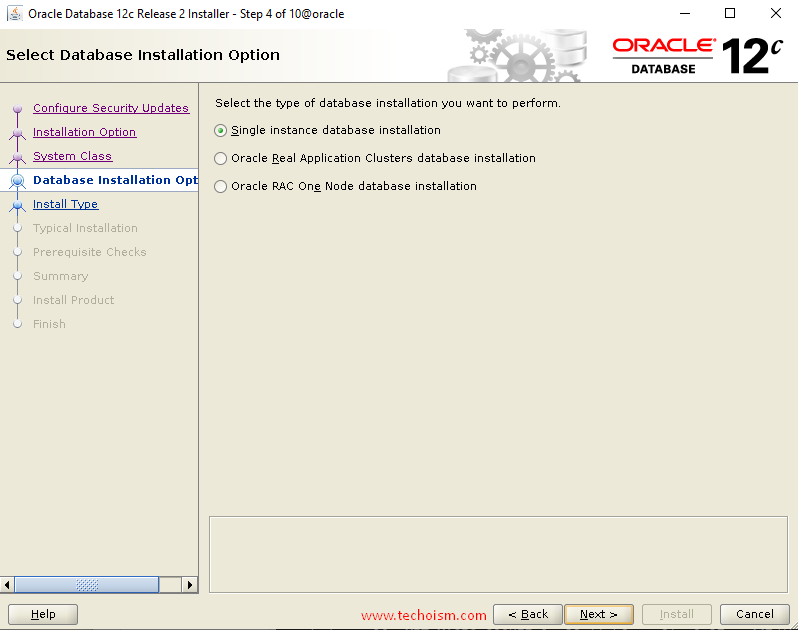
In this section, Select the type of installation you want to select and click “Next”
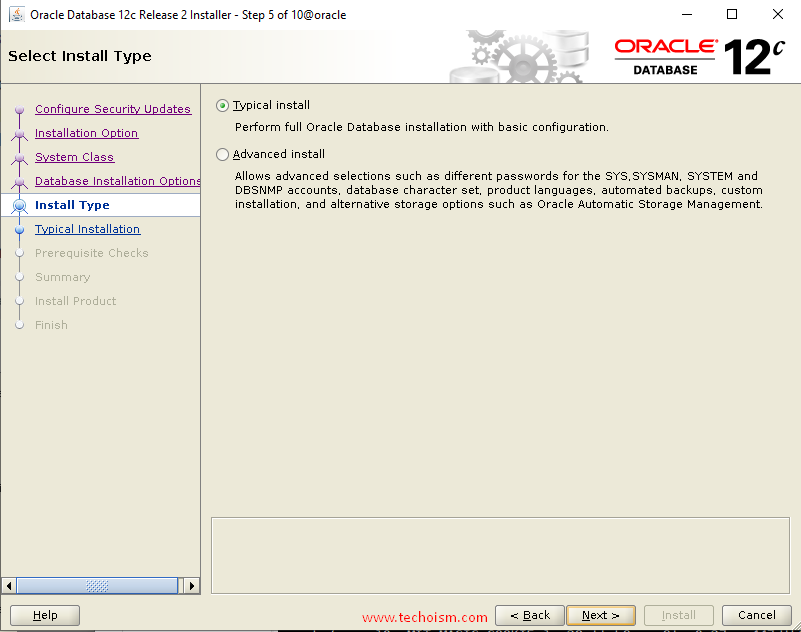
Select the installation type and click “Next”
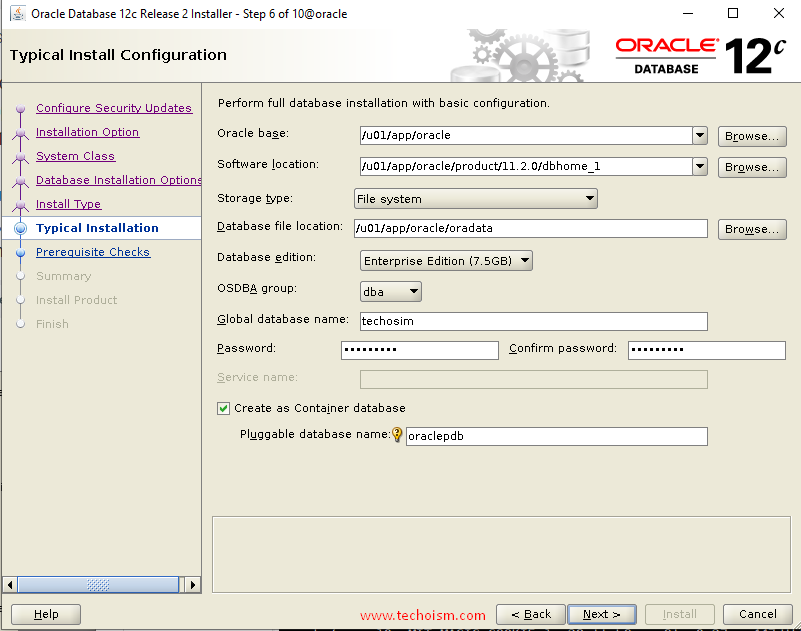
Now specify full database installation with basic configuration and click “Next”
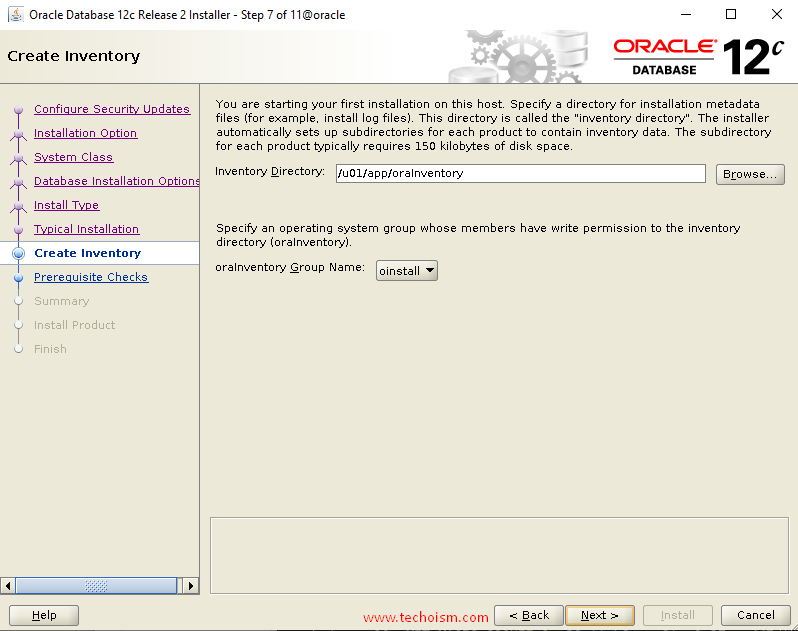
You are starting your first installation on the host. Specify a directory for Installation metadata files and click “Next”
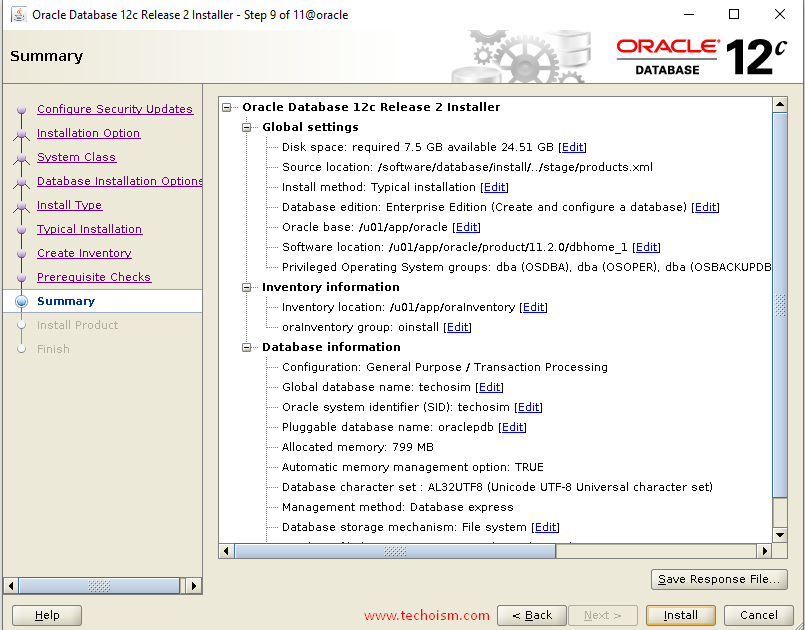
Verify that the installation pre-checks are completed without errors. then it will show the summary of the information such as global settings, database information, etc. Review the information and click “install”.
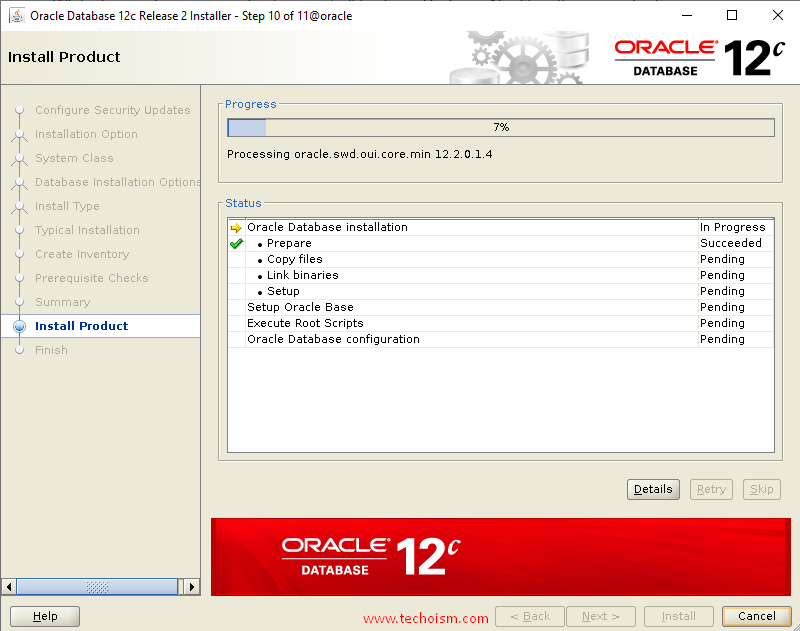
Now installation of Oracle Database has been started. It will take a few minutes to complete.
During the installation you need to run a couple of scripts to set the required permissions.
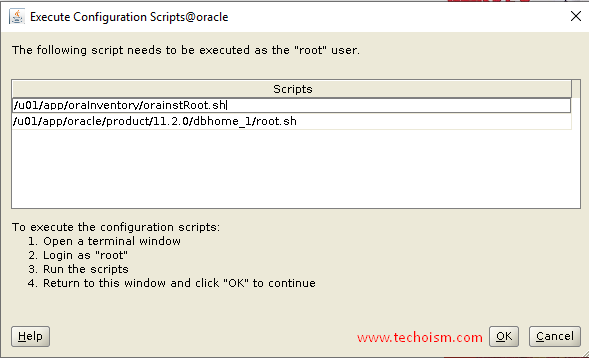
# /u01/app/oraInventory/orainstRoot.sh
Changing permissions of /u01/app/oraInventory.
Adding read,write permissions for group.
Removing read,write,execute permissions for world.

Changing groupname of /u01/app/oraInventory to oinstall.
The execution of the script is complete.
# /u01/app/oracle/product/11.2.0/dbhome_1/root.sh
Performing root user operation.
 The following environment variables are set as:
     ORACLE_OWNER= oracle
     ORACLE_HOME=  /u01/app/oracle/product/11.2.0/dbhome_1
 Enter the full pathname of the local bin directory: [/usr/local/bin]:
    Copying dbhome to /usr/local/bin …
    Copying oraenv to /usr/local/bin …
    Copying coraenv to /usr/local/bin …
 Creating /etc/oratab file…
 Entries will be added to the /etc/oratab file as needed by
 Database Configuration Assistant when a database is created
 Finished running generic part of root script.
 Now product-specific root actions will be performed.
 Do you want to setup Oracle Trace File Analyzer (TFA) now ? yes|[no] :
 Oracle Trace File Analyzer (TFA - User Mode) is available at :
     /u01/app/oracle/product/11.2.0/dbhome_1/suptools/tfa/release/tfa_home/bin/tfactl
 OR
 Oracle Trace File Analyzer (TFA - Daemon Mode) can be installed by running this script :
     /u01/app/oracle/product/11.2.0/dbhome_1/suptools/tfa/release/tfa_home/install/roottfa.sh

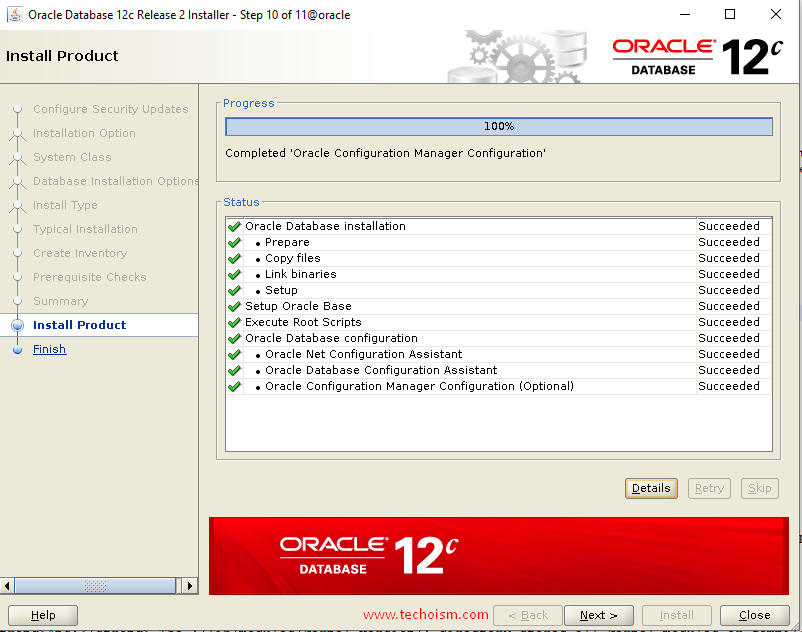
Oracle database configuration has been completed and click “Next”.
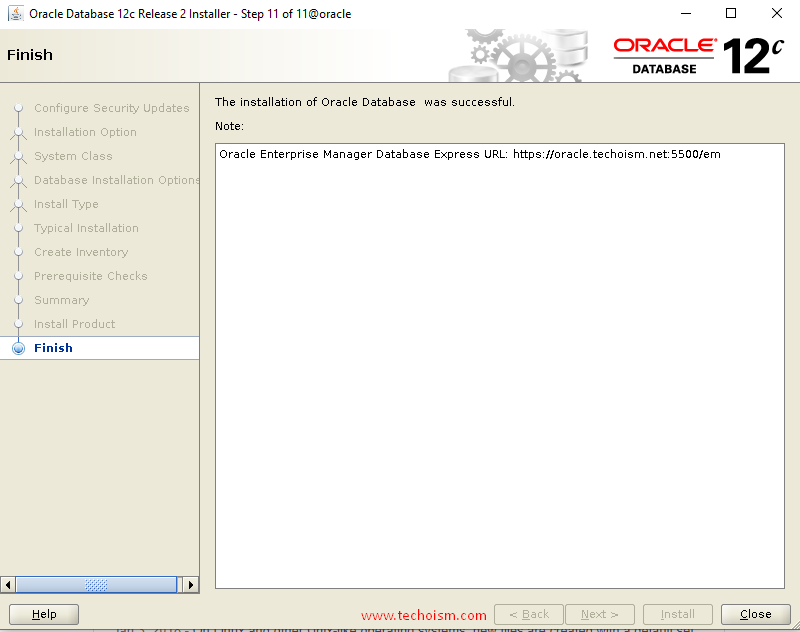
Step 8: Access Oracle Enterprise Manager
When it is finished, you will be presented with the message indicating the URL of the Oracle Enterprise Manager:
https://oracle.techoism.net:5500/em
Step 10: Set Oracle Home Directory
Add the following lines in user home directory at .bash_profile file.
# su - oracle
# vim .bashrc
TMPDIR=$TMP; export TMPDIR
ORACLE_BASE=/u01/app/oracle; export ORACLE_BASE
ORACLE_HOME=$ORACLE_BASE/product/12.1.0/dbhome_1; export ORACLE_HOME
ORACLE_SID=techoism; export ORACLE_SID
PATH=$ORACLE_HOME/bin:$PATH; export PATH
LD_LIBRARY_PATH=$ORACLE_HOME/lib:/lib:/usr/lib:/usr/lib64; export LD_LIBRARY_PATH
CLASSPATH=$ORACLE_HOME/jlib:$ORACLE_HOME/rdbms/jlib; export CLASSPATH
Execute the mention command.
# source .bash_profile
Step 11: Listener File Configuration
Finally replace the host in listener.ora file.
# vim $ORACLE_HOME/network/admin/listener.ora
Find below parameter.
(ADDRESS = (PROTOCOL = TCP)(HOST = oracle.techoism.net)(PORT = 1521)
Change the parameter with 0.0.0.0
(ADDRESS = (PROTOCOL = TCP)(HOST = 0.0.0.0)(PORT = 1521)
Step 12: Enabling Oracle to Start on System Boot
To enable the database service to start automatically on boot, create the service file for oracle database and add the mention lines.
# vim /etc/systemd/system/oracle-rdbms.service
#/etc/systemd/system/oracle-rdbms.service
#Invoking Oracle scripts to start/shutdown Instances defined in /etc/oratab #and starts Listener

[Unit]
Description=Oracle Database(s) and Listener
Requires=network.target

[Service]
Type=forking
Restart=no
ExecStart=/u01/app/oracle/product/12.2.0/dbhome_1/bin/dbstart /u01/app/oracle/product/12.2.0/dbhome_1
ExecStop=/u01/app/oracle/product/12.2.0/dbhome_1/bin/dbshut /u01/app/oracle/product/12.2.0/dbhome_1
User=oracle

[Install]
WantedBy=multi-user.target
Finally, indicate to database to be brought up during boot.
# vim /etc/oratab
Find the mention line.
techoism:/u01/app/oracle/product/12.2.0/dbhome_1:N
Replace ‘N’ with ‘Y’.
techoism:/u01/app/oracle/product/12.2.0/dbhome_1:Y
Reference: Know more about Oracle 12c Database
Enjoy it!
