Install Memcached with PECL Memcache on Ubuntu
Memcached is a high-performance, in-memory storing that caches objects for faster website performance. Rather than disk caching, Memcached stores objects in memory which is faster thann disk. It is extremely valuable for caching so as to improve dynamic sites and enabled speed by caching objects in memory.

See Also:
In this article we will explain how to install Memcached on Ubuntu 12.04, 14.04, 14.10 and 15.04 systems.
Step #1 Install Memcached
First we prefer to update all of the packages of your system
# sudo apt-get update
Now use following command to install memcached on your system.
# sudo apt-get install memcached
Step #2 Memcached Server Configuration
Memcached configuration file as below:
# sudo vim /etc/memcached.conf
Note:
Step #3 Restart Memcached service
Run below command to start the memcached service:
For Ubuntu 12.04/14.04/14.10
# sudo service memcached restart
For Ubuntu 15.04
# sudo systemctl restart memcached
Step #4 Install Memcache PHP Extension with pecl
Finally install Memcache php extension using PECL to finish setup.
# sudo pecl install memcache
Now create php memcache configuration file. Before creating a new file just make sure that php memcache configuration file available or not. If file already exists just skip below command.
# echo "extension=memcache.so" > /etc/php5/apache2/conf.d/20-memcache.ini
Step #5 Restart Apache2 service
Run below command to start the memcached service:
For Ubuntu 12.04/14.04/14.10
# sudo service apache2 status
For Ubuntu 15.04
# sudo systemctl start apache2
Step #6 Verify Memcache Setup
Use following command to verify that memcached service is running fine or not.
# echo "stats settings" | nc localhost 11211
STAT maxbytes 67108864
STAT maxconns 1024
STAT tcpport 11211
STAT udpport 11211
STAT inter 127.0.0.1
STAT verbosity 0
STAT oldest 0
STAT evictions on
STAT domain_socket NULL
STAT umask 700
STAT growth_factor 1.25
STAT chunk_size 48
STAT num_threads 4
STAT num_threads_per_udp 4
STAT stat_key_prefix :
STAT detail_enabled no
STAT reqs_per_event 20
STAT cas_enabled yes
STAT tcp_backlog 1024
STAT binding_protocol auto-negotiate
STAT auth_enabled_sasl no
STAT item_size_max 1048576
STAT maxconns_fast no
STAT hashpower_init 0
STAT slab_reassign no
STAT slab_automove 0
END
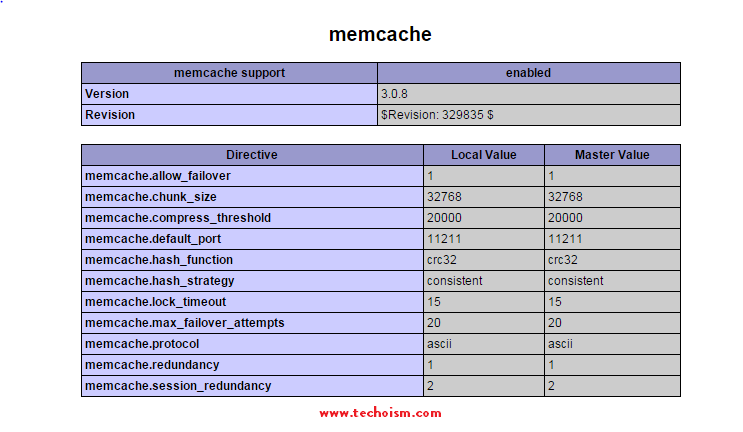
Step #7 Check Memcache PHP Extension
Now check Memcache php extension is enabled and working properly.
# sudo vim /var/www/html/info.php
Now access below url to check memcache PHP Extension.
http://server-ip/info.php
Or
http://Hostname/info.php
Enjoy it!


