How to Create New Partition using LVM in Linux
LVM is a disk management solution that allow administrators to manage disk space. If a file system needs more space, it can be added to its logical volumes from the free spaces in its volume group and the file system can be re-sized as we wish. LVM allow you to manage disk space more effectively. LVM allow you to add, remove space from existing volume.
See Also:
Before you start creating LVM partition, make sure you understand physical volume(PV), volume group (VG), and logical volume (LV).
Physical volume (PV): PV are the partitions on hard disk, or hard disk itself. PV are the base of LVM structure and referred as physical volumes.
Volume Group (VG): VG are the combined physical volume into a single pool of storage. Think it is as a group of PV.
Logical volume (LV): LV are the actual partitions on system created from VG.
In this article we will explain how to create new partition using LVM in linux.
List All Partition
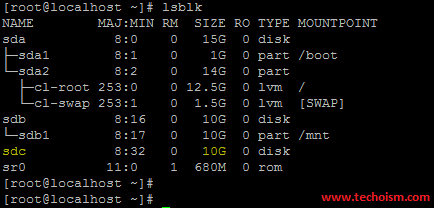
lsblk command by default list all partition in a tree-like format. Run below command as follows:
# lsblk
The output is as follows:
Or
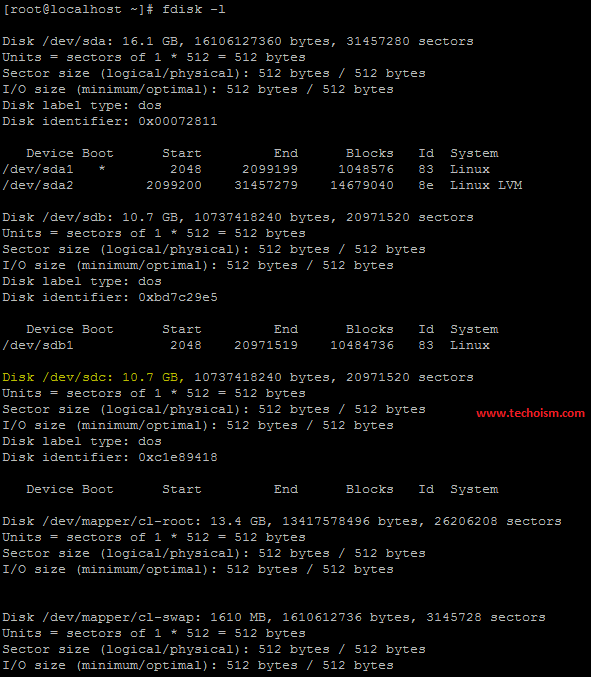
You can all use fdisk command to list all partition, use following command as follows:
# fdsik -l
The output is as follows:
Create New Partition
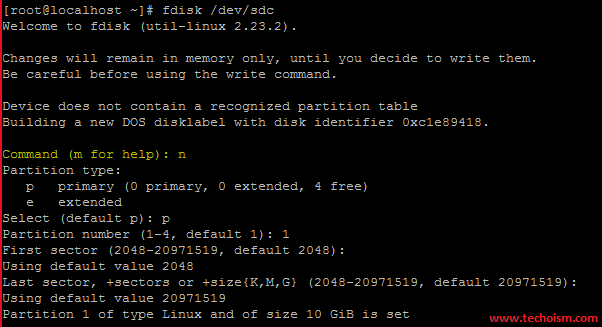
With the help of fdisk command we can create new partitions. Execute below command to create new partition.
# fdsik /dev/sdc
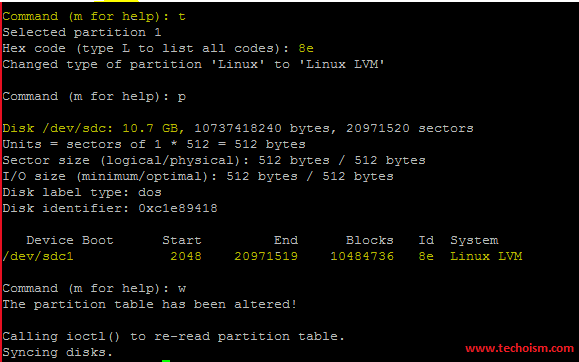
Type m and press Enter to see a list of the commands you can use to create partition. Use the n command to create a new partition. You can create a logical or primary partition (l for logical or p for primary). A disk can only have four primary partitions.
Here we need to change the type of newly created partition using t, we need to create LVM so we need to type of partition using code of LVM as 8e, if we do not know the type code Press L to list all type codes.
Create Physical Volume:
we need to choose the physical volumes that will be used to create the LVM. We can create the physical volumes using pvcreate command. pvcreate command is used to create physical volume.
# pvcreate /dev/sdc1
Note: You can also create physical volume using multiple disk also.
# pvcreate /dev/sdc1 /dev/sdd1 /dev/sde1
Create Volume Group:
Volume group is collection of physical volumes. Volume groups are nothing but a pool of storage that consists of one or more physical volumes. Once you create the physical volume, you can create the volume group (VG) from these physical volumes (PV).
# vgcreate vg_tech /dev/sdc1
Note: You can also create volume group using multiple physical volume also.
# vgcreate vg_tech /dev/sdc1 /dev/sdd1 /dev/sde1
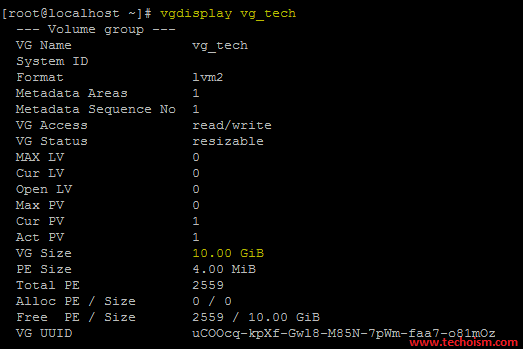
To get more information about newly created volume groups, run the following command.
# vgdisplay vg_tech
Create Logical Volume:
A volume group is divided up into logical volumes. We can create logical volume with lvcreate command by giving the name of a new logical volume, its size, and the volume group.
By Size:
# lvcreate -L +5G -n lv_tech vg_tech
Or
# lvcreate --size +5G --name lv_tech vg_tech
By Physical Extents:
# lvcreate -l 1279 -n lv_extent_tech vg_tech
Or
# lvcreate --extents 1279 --name lv_extent_tech vg_tech
Note: Physical Extents are nothing but equal-sized chunks. LVM processes the storage in terms of extents. We can also change the extent size using -s flag. By default the size of extents is 4MB.
Formatting a Partition
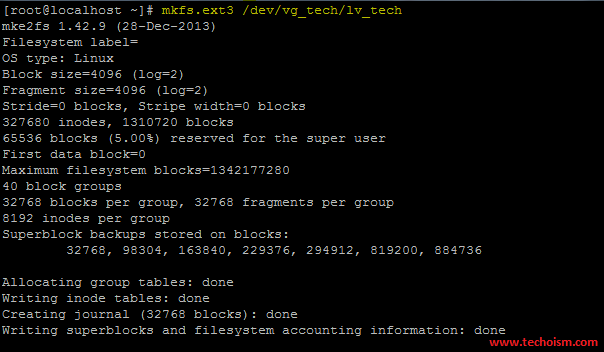
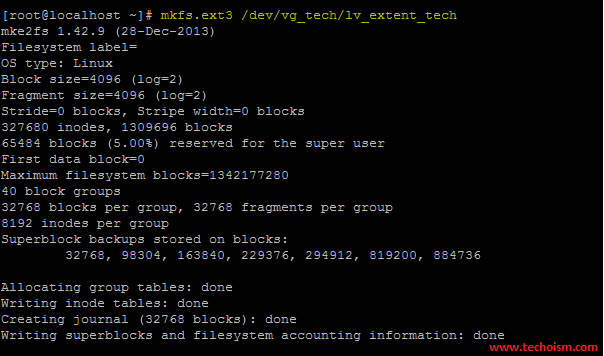
Before using the both partition, you need to format both new partitions with a file system. You can do this with mkfs command.
# mkfs.ext3 /dev/vg_tech/lv_tech
# mkfs.ext3 /dev/vg_tech/lv_extent_tech
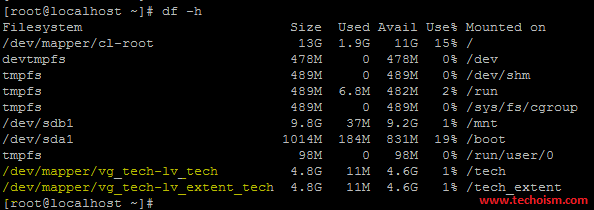
Mount The Partition
You have successfully formatted the filesystem. Now you can mount the partition and use it.
Mount Temporary
# mount /dev/vg_tech/lv_tech /tech
# mount /dev/vg_tech/lv_extent_tech /tech_extent
Mount Permanent
You can mount the partition permanently adding entry in fstab file.
# vim /etc/fstab
Add below line at the end of file.
/dev/vg_tech/lv_tech         /tech           ext3    defaults  0 0
/dev/vg_tech/lv_extent_tech  /tech_extent    ext3    defaults  0 0
Run following command to mount the drive at run time.
# mount -a
Enjoy it!




Very well explained, thanks 🙂
Clear and precise.
Thanks
Hi, great article thanks. You might want to check the fdisk commands though – # fdsik -l for example.